
Introduction
Stream Video SDK for Unity excels not only in video but also in building audio-only communications. In this tutorial, we'll guide you through creating an Audio Rooms App, where participants can engage in real-time audio sharing sessions. This example is an excellent starting point for developers looking to implement in-game or lobby voice chats. You’ll have full control over participant grouping, allowing you to organize players by level, clan/club, or even into general-purpose voice channels that are open to all players. Let's dive in!
Prerequisites
To follow this tutorial, you must install a Unity Editor. We'll use the 2021.3.26f1 LTS version, but any supported Unity version will do just fine. You can check the complete list of supported Unity Editor versions here.
Step 1 - Download Starting Project
To speed you up, we've prepared a starting Unity Project that you can download from our GitHub repository. You can download it using git or click here to download the project in a zip file.
Download the project and open it in Unity Editor.
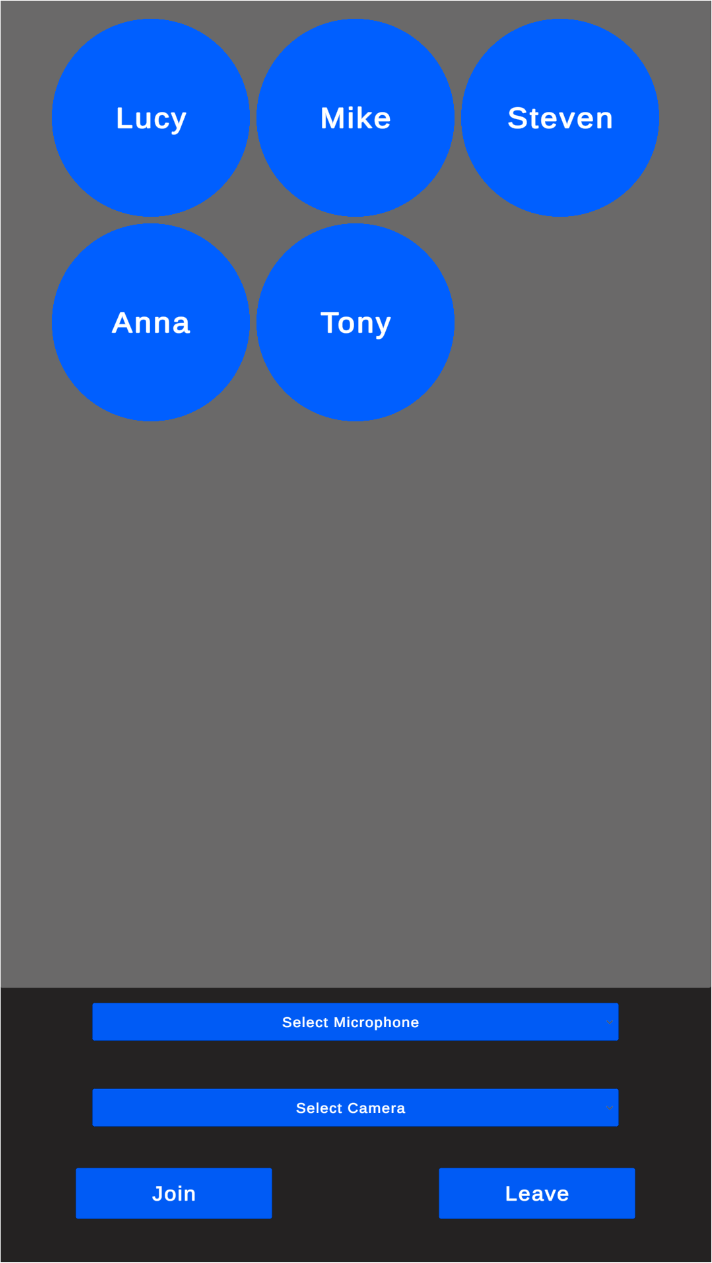
The starting project contains the UI components that we will use throughout this tutorial.
Step 1 - Add Stream's Video SDK for Unity
Follow the installation section to see how to import Stream's Video SDK into a Unity Project.
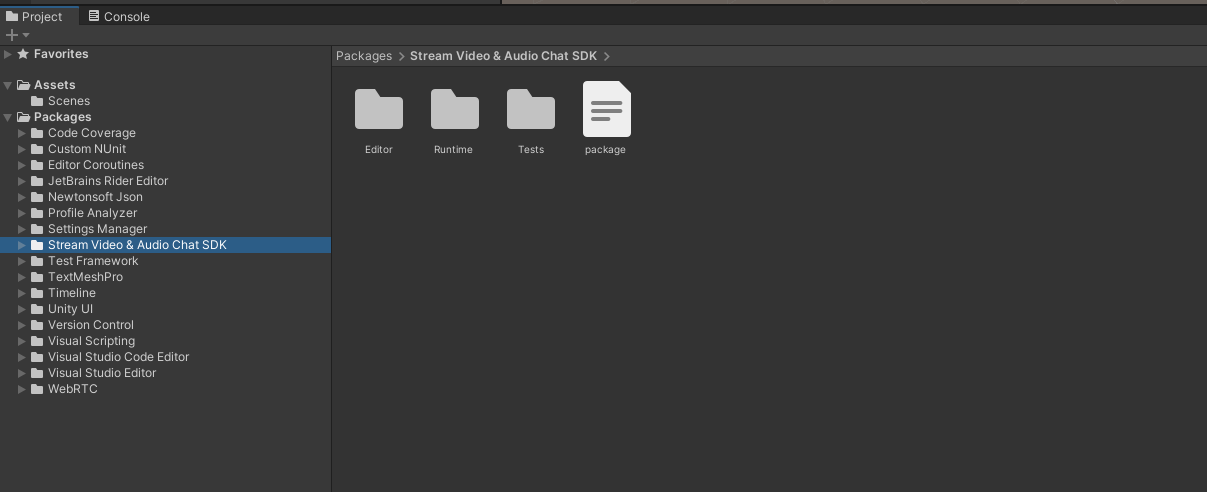
After completing this step, you should see the Stream Video & Audio Chat SDK package under Packages in the Project window.
Step 2 - Create the Stream Client instance
- Open the
AudioRoomsTutorialscene from theScenesfolder - In the Project window, navigate to Assets -> Scripts folder
- Create a new script file and name it
AudioRoomsManager.cs - Open the
AudioRoomsManager.csin your code editor and replace it with the following script:
1234567891011121314151617181920212223242526272829303132333435363738394041using System;
using System.Collections.Generic;
using System.Threading.Tasks;
using StreamVideo.Core;
using StreamVideo.Core.StatefulModels;
using StreamVideo.Libs.Auth;
using UnityEngine;

public class AudioRoomsManager : MonoBehaviour
{
    public IStreamVideoClient StreamClient { get; private set; }

    protected async void Awake()
    {
        // Create Client instance
        StreamClient = StreamVideoClient.CreateDefaultClient();

        var credentials = new AuthCredentials(_apiKey, _userId, _userToken);

        try
        {
            // Connect user to Stream server
            await StreamClient.ConnectUserAsync(credentials);
            Debug.Log($"User `{_userId}` is connected to Stream server");
        }
        catch (Exception e)
        {
            // Log potential issues that occured during trying to connect
            Debug.LogException(e);
        }
    }

    [SerializeField]
    private string _apiKey;

    [SerializeField]
    private string _userId;

    [SerializeField]
    private string _userToken;
}
Let's go through this script step by step.
These fields:
12345678[SerializeField]
private string _apiKey;

[SerializeField]
private string _userId;

[SerializeField]
private string _userToken;
define the authorization variables: api key, user id and the user token - essential to connect a User to the Stream Video API. The SerializeField attribute exposes them in Unity's Inspector and allows us to set them in the Unity Editor.
This line instantiates the client for the Stream's Video & Audio SDK:
1StreamClient = StreamVideoClient.CreateDefaultClient();
The StreamVideoClient is the main component to initiate video and audio communication in Unity.
Next, we wrap the authorization credentials in a convenient structure:
1var credentials = new AuthCredentials(_apiKey, _userId, _userToken);
And finally, we call the ConnectUserAsync that will attempt to establish a connection:
1await StreamClient.ConnectUserAsync(credentials);
We're using .NET's modern async/await syntax, which makes writing asynchronous code that waits for server response very clean & concise.
After the await completes, we should be connected to the Stream server.
We've wrapped the asynchronous ConnectUserAsync method in a try/catch block. If you're not familiar with handling exceptions in asynchronous methods - we advise you to always wrap awaited methods in a try/catch block to catch any thrown exceptions and never miss any errors that can occur during async operations.
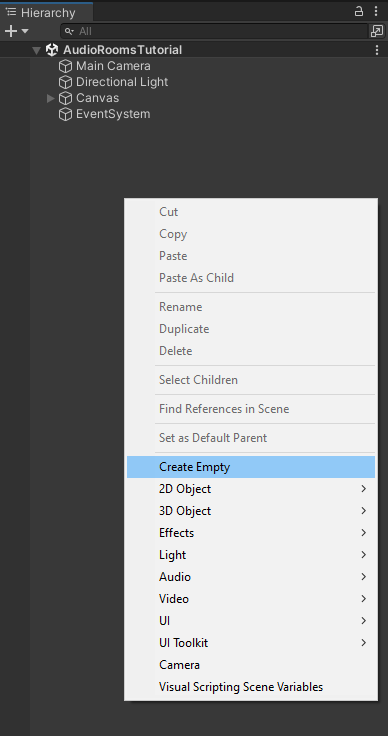
Next, go to the Scene Hierarchy window, and create an empty game object, and name it AudioRoomsManager:
Next, drag in the newly created AudioRoomsManager.cs script onto the AudioRoomsManager game object and save the scene.
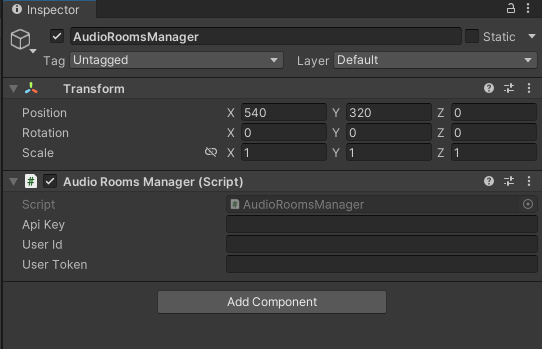
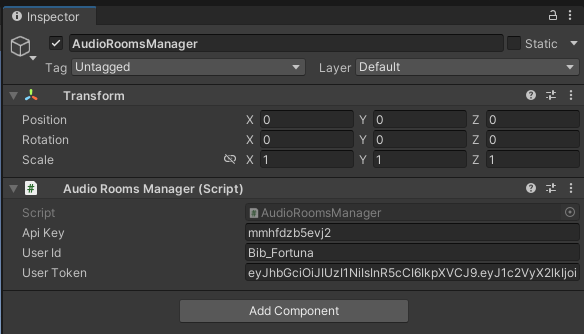
Once you select the AudioRoomsManager game object, you should see the Api Key, User Id, and the User Token fields visible in the Inspector window.
Step 3 - Connect a user to Stream server
You need a valid set of authorization credentials to run this script that will connect a user to Stream Video API. In an actual project, you'd obtain the api key assigned to your application from the Stream's Dashboard. The user id and the user token would typically be generated by your backend service using one of our server-side SDKs. To keep things simple, you can use the following set of credentials for this tutorial:
Here are credentials to try out the app with:
| Property | Value |
|---|---|
| API Key | Waiting for an API key ... |
| Token | Token is generated ... |
| User ID | Loading ... |
| Call ID | Creating random call ID ... |
Note: Test credentials provided above will be unique for each browser session. To join the call from multiple devices, ensure you copy and use the same Call ID
Copy the api key, user id, and the user token from the window above and paste them into the corresponding fields in the AudioRoomsManager game object:
- API KEY -> Api Key
- Token -> User Token
- User ID -> User Id
Save the scene.
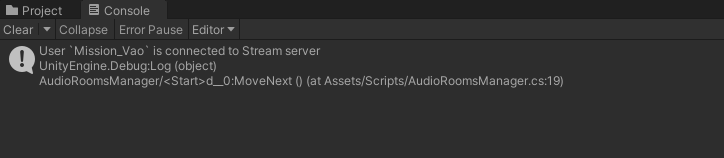
Once you run the project (Press the Play button in Unity Editor), you should see a log in Unity Console confirming that the user is connected to the stream server:
Step 4 - Add methods to join and leave the call
In this step, we'll add methods to Join and Leave the call - these will be called from our UI when the user clicks on the Join and Leave buttons.
Open the AudioRoomsManager.cs script and apply the following changes:
First, add the _activeCall field to the class:
1private IStreamCall _activeCall;
The fields part of the class should now look like this:
12345678910[SerializeField]
private string _apiKey;

[SerializeField]
private string _userId;

[SerializeField]
private string _userToken;

private IStreamCall _activeCall;
Next, add the following methods to the AudioRoomsManager class:
123456789101112131415public async Task JoinCallAsync(string callId)
{
    _activeCall = await StreamClient.JoinCallAsync(StreamCallType.Default, callId, create: true, ring: false, notify: false);
}

public async Task LeaveCallAsync()
{
    if (_activeCall == null)
    {
        Debug.LogWarning("Leave request ignored. There is no active call to leave.");
        return;
    }

    await _activeCall.LeaveAsync();
}
Step 5 - Create the UI manager
Next, we'll create the UI Manager script to reference all UI elements and handle user interactions.
- In the Scripts folder, create a new script and call it
UIManager.cs - Open this script in your code editor and replace the file contents with the following code:
1234567891011121314151617181920212223242526272829303132333435363738394041424344454647484950515253545556575859606162636465666768697071727374757677787980818283848586878889909192using System;
using System.Collections.Generic;
using System.Linq;
using StreamVideo.Core.DeviceManagers;
using StreamVideo.Core.StatefulModels;
using TMPro;
using UnityEngine;
using UnityEngine.UI;

public class UIManager : MonoBehaviour
{
    // Start is called automatically by Unity Engine
    private void Start()
    {
        var streamClient = _audioRoomsManager.StreamClient;
        _audioDeviceManager = streamClient.AudioDeviceManager;

        // Add listeners to when user clicks on the buttons
        _joinButton.onClick.AddListener(OnJoinButtonClicked);
        _leaveButton.onClick.AddListener(OnLeaveButtonClicked);

        // Clear default options.
        _microphoneDropdown.ClearOptions();

        // Get available microphone devices
        var microphones = _audioDeviceManager.EnumerateDevices();

        // Store microphones in a list to later retrieve selected option by index
        _microphoneDevices.AddRange(microphones);

        // Get list of microphone names and populate the dropdown
        var microphoneLabels = _microphoneDevices.Select(d => d.Name).ToList();
        _microphoneDropdown.AddOptions(microphoneLabels);
    }

    private async void OnLeaveButtonClicked()
    {
        try
        {
            await _audioRoomsManager.LeaveCallAsync();
        }
        catch (Exception e)
        {
            Debug.LogException(e);
        }
    }

    private async void OnJoinButtonClicked()
    {
        if (string.IsNullOrEmpty(_callIdInput.text))
        {
            Debug.LogError("Please provide call ID");
            return;
        }

        try
        {
            await _audioRoomsManager.JoinCallAsync(_callIdInput.text);
        }
        catch (Exception e)
        {
            Debug.LogException(e);
        }
    }

    [SerializeField]
    private ParticipantPanel _participantPanelPrefab;

    [SerializeField]
    private Transform _participantsContainer;

    [SerializeField]
    private TMP_InputField _callIdInput;

    [SerializeField]
    private Button _joinButton;

    [SerializeField]
    private Button _leaveButton;

    [SerializeField]
    private TMP_Dropdown _microphoneDropdown;

    [SerializeField]
    private AudioRoomsManager _audioRoomsManager;

    // Store list of available microphone device so we can retrieve them by index when user select option from the dropdown
    private readonly List<MicrophoneDeviceInfo> _microphoneDevices = new List<MicrophoneDeviceInfo>();

    // Stream's Audio Device Manager handles microphone interactions
    private IStreamAudioDeviceManager _audioDeviceManager;
}
Let's break this down.
First, examine the fields section located at the bottom of the class:
1234567891011121314151617181920212223242526[SerializeField]
private ParticipantPanel _participantPanelPrefab;

[SerializeField]
private Transform _participantsContainer;

[SerializeField]
private TMP_InputField _callIdInput;

[SerializeField]
private Button _joinButton;

[SerializeField]
private Button _leaveButton;

[SerializeField]
private TMP_Dropdown _microphoneDropdown;

[SerializeField]
private AudioRoomsManager _audioRoomsManager;

// Stores a list of available microphone devices for retrieval by index when a user selects an option from the dropdown
private readonly List<MicrophoneDeviceInfo> _microphoneDevices = new List<MicrophoneDeviceInfo>();

// Stream’s Audio Device Manager handles all interactions with microphones
private IStreamAudioDeviceManager _audioDeviceManager;
Let's look in more detail on what each field will reference:
_participantPanelPrefab: a prefab representing each call participant_participantsContainer: a container for the spawned participant prefabs_callIdInput: an input field for entering the Call ID to connect_joinButton&_leaveButton: Join and Leave buttons, respectively_microphoneDropdown: a dropdown for selecting an active microphone device_audioRoomsManager: manager script that we've defined in previous steps_microphoneDevices: a list of available microphones; used to retrieve the selected microphone based on the dropdown’sonValueChangedcallback index_audioDeviceManager: manages all microphone interactions
Now let's analyze the Start method.
12var streamClient = _audioRoomsManager.StreamClient;
_audioDeviceManager = streamClient.AudioDeviceManager;
First, we get a reference to the StreamVideoClient instance exposed by the StreamClient property of the AudioRoomsManager.
Note that we're executing this code using the Start method instead of the Awake method. This is because the StreamClient property is initialized by the AudioRoomsManager in the Awake method, which Unity calls before the Start method. This way, we ensure that the AudioRoomsManager has created the instance of the Stream Client before the UIManager tries to access it.
Next:
12_joinButton.onClick.AddListener(OnJoinButtonClicked);
_leaveButton.onClick.AddListener(OnLeaveButtonClicked);
We subscribe the OnJoinButtonClicked method to Join button click event and the OnLeaveButtonClicked method to Leave button click event.
Next, we handle the microphone dropdown:
123456789101112// Clear default options.
_microphoneDropdown.ClearOptions();

// Get available microphone devices
var microphones = _audioDeviceManager.EnumerateDevices();

// Store microphones in a list to later retrieve selected option by index
_microphoneDevices.AddRange(microphones);

// Get list of microphone names and populate the dropdown
var microphoneLabels = _microphoneDevices.Select(d => d.Name).ToList();
_microphoneDropdown.AddOptions(microphoneLabels);
ClearOptionsis called to remove default options from the dropdown._audioDeviceManager.EnumerateDevices()fetches available microphone devices. We then add them to the_microphoneDeviceslist, so we can later retrieve the selected option by index._microphoneDevices.Select(d => d.Name).ToList()uses LINQ to get theNameproperty from each microphone struct._microphoneDropdown.AddOptions(microphoneLabels)adds the list of microphone names as dropdown entries.
The OnJoinButtonClicked validates that the Call ID is set and calls the JoinCallAsync on the AudioRoomsManager:
123456789101112131415161718private async void OnJoinButtonClicked()
{
    // Validate input
    if (string.IsNullOrEmpty(_callIdInput.text))
    {
        Debug.LogError("Please provide call ID");
        return;
    }

    try
    {
        await _audioRoomsManager.JoinCallAsync(_callIdInput.text);
    }
    catch (Exception e)
    {
        Debug.LogException(e);
    }
}
The OnLeaveButtonClicked calls the LeaveCallAsync on the AudioRoomsManager:
1234567891011private async void OnLeaveButtonClicked()
{
    try
    {
        await _audioRoomsManager.LeaveCallAsync();
    }
    catch (Exception e)
    {
        Debug.LogException(e);
    }
}
Next:
- In Unity Editor, go to the Hierarchy window, create a new empty game object, and name it
UIManager. - Select the
UIManagergame object and attach theUIManager.csscript to it. - Save the scene
You should now have a UIManager game object with UIManager.cs script attached to it:
Step 6 - Setup UIManager references in the inspector
The UIManager will interact with UI elements and the prefab asset. Therefore, we must attach all references visible in the inspector window when you select the UIManager game object.
In case you're wondering how to do this swiftly, you can follow these steps:
- Select the
UIManagergame object in the Hierarchy window and lock the window (Read Unity Docs on how to lock Inspector window) - Use the Hierarchy's window search input to search for each game object by name and drag it into the corresponding field in the locked Inspector window.
- Unlock the Inspector window
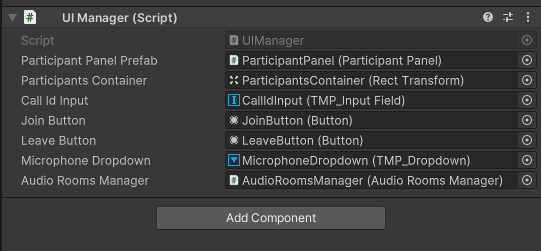
Here's a full list of UIManager fields and the corresponding game objects that we want to attach:
Participant Prefab- This is the only one that we'll drag in from the Project window, drag in the Prefabs/ParticipantPanel prefab fileParticipants Container- Search forParticipantsContainerin the Hierarchy windowCall Id Input- Search forCallIdInputin the Hierarchy windowJoin Button- Search for theJoinButtonin the Hierarchy windowLeave Button- Search for theLeaveButtonin the Hierarchy windowMicrophone Dropdown- Search for theMicrophoneDropdownin the Hierarchy windowAudio Rooms Manager- Search for theAudioRoomsManagerin the Hierarchy window
These are the game objects, from the Scene Hierarchy, that should be attached to the UIManager script:
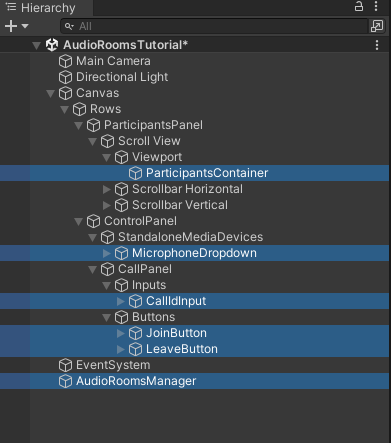
And on to of the hierarchy game objects, we attach the Prefabs/ParticipantPanel prefab file from the Project window.
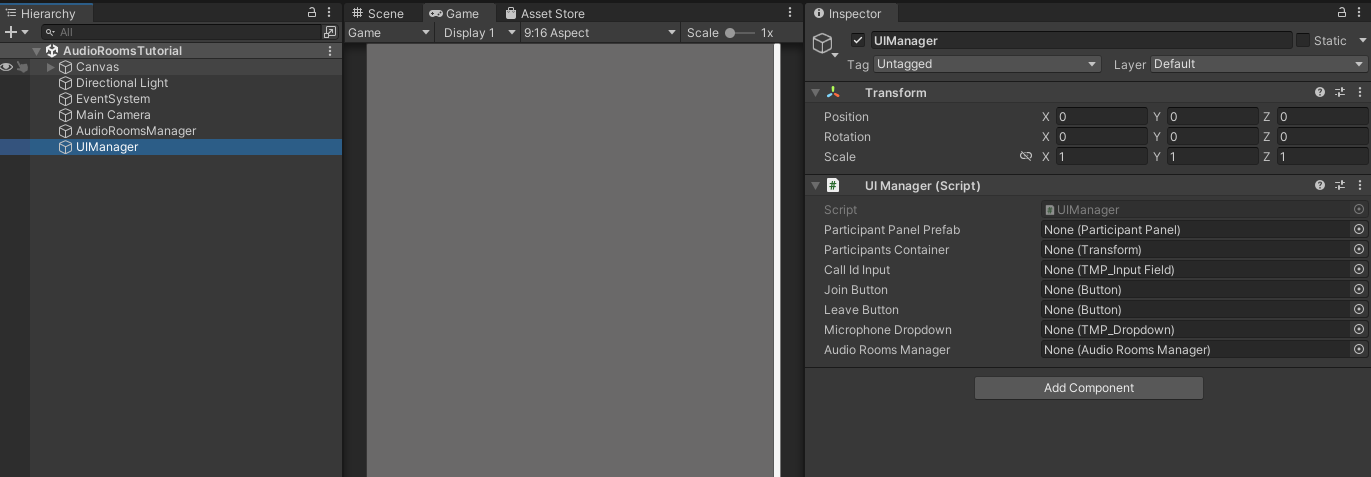
After completing this step, your UIManager game object should look as below:
Save the scene.
Step 7 - Capture Microphone Input
Now, let's add sending audio input captured from the microphone device.
Open the UIManager.cs in the code editor and add the following method to the class:
1234567private void OnMicrophoneDeviceChanged(int deviceIndex)
{
    var selectedMicrophone = _microphoneDevices[deviceIndex];

    // Select microphone and enable it meaning it will start capturing audio input immediately
    _audioDeviceManager.SelectDevice(selectedMicrophone, enable: true);
}
The OnMicrophoneDeviceChanged method will be triggered by the microphone dropdown onValueChanged event when a user selects a new microphone from the dropdown. The onValueChanged event passes an integer argument that we named deviceIndex, representing the index of the option chosen.
Next, add these lines to the end of the Start method in the UIManager class:
12345// Add listener method to when user changes microphone in the dropdown
_microphoneDropdown.onValueChanged.AddListener(OnMicrophoneDeviceChanged);

// Set first microphone device active. User can change active microphone via dropdown
OnMicrophoneDeviceChanged(0);
Here, we've subscribed the OnMicrophoneDeviceChanged to the dropdown onValueChanged event. Next, we're calling the OnMicrophoneDeviceChanged method with the 0 argument to select the first microphone as a default option.
Step 8 - Handle call participants
Next open the AudioRoomsManager.cs script and apply the following changes:
First, add the following code to the class:
12public event Action<IStreamVideoCallParticipant> ParticipantJoined;
public event Action<string> ParticipantLeft;
Here, we defined event to notify the UIManager when participants join or leave the call.
Next, add these 2 methods:
123456789private void OnParticipantJoined(IStreamVideoCallParticipant participant)
{
    ParticipantJoined?.Invoke(participant);
}

private void OnParticipantLeft(string sessionId, string userid)
{
    ParticipantLeft?.Invoke(sessionId);
}
Next, replace the JoinCallAsync method with the following code:
1234567891011121314public async Task JoinCallAsync(string callId)
{
    _activeCall = await StreamClient.JoinCallAsync(StreamCallType.Default, callId, create: true, ring: false, notify: false);

    // Handle already present participants
    foreach (var participant in _activeCall.Participants)
    {
        OnParticipantJoined(participant);
    }

    // Subscribe to events in order to react to participant joining or leaving the call
    _activeCall.ParticipantJoined += OnParticipantJoined;
    _activeCall.ParticipantLeft += OnParticipantLeft;
}
The above code extends the previous implementation with:
- Calling
OnParticipantJoinedfor each participant that's already present on the call -_activeCall.Participants. - Subscribing to
ParticipantJoinedandParticipantLeftevents, so we get notified whenever a participant joins or leaves the call.
Lastly, replace the LeaveCallAsync method with:
1234567891011121314public async Task LeaveCallAsync()
{
    if (_activeCall == null)
    {
        Debug.LogWarning("Leave request ignored. There is no active call to leave.");
        return;
    }

    // Unsubscribe from events
    _activeCall.ParticipantJoined -= OnParticipantJoined;
    _activeCall.ParticipantLeft -= OnParticipantLeft;

    await _activeCall.LeaveAsync();
}
We've extended the previous implementation with unsubscribing from the ParticipantJoined and ParticipantLeft events.
Step 9 - Setup UI view for a call participant
The final key component we need to cover is handling participants and their tracks. A participant is a user who connects to a call using a device. If a user joins the call from multiple devices, each device is treated as a separate participant. Tracks represent either Audio or Video data received from a participant. In this tutorial, we'll be using audio tracks only.
Open the ParticipantPanel.cs script, located in the Scripts folder, and replace it with the following code:
123456789101112131415161718192021222324252627282930313233343536373839404142434445464748495051using StreamVideo.Core.StatefulModels;
using StreamVideo.Core.StatefulModels.Tracks;
using UnityEngine;

public class ParticipantPanel : MonoBehaviour
{
    public void Init(IStreamVideoCallParticipant participant)
    {
        _participant = participant;

        // Add debug name so we can see in the Unity Editor which participant this game object represents.
        gameObject.name = $"Participant - {participant.Name} ({participant.SessionId})";

        // Process already available tracks
        foreach (var track in _participant.GetTracks())
        {
            OnTrackAdded(_participant, track);
        }

        // Subscribe to TrackAdded - this way we'll handle any track added in the future
        _participant.TrackAdded += OnTrackAdded;
    }

    private void OnTrackAdded(IStreamVideoCallParticipant participant, IStreamTrack track)
    {
        Debug.Log($"Track of type `{track.GetType()}` added for {_participant.Name}");

        // For this tutorial we only care for audio tracks but video tracks are also possible
        if (track is StreamAudioTrack streamAudioTrack)
        {
            // Create AudioSource
            _audioOutputAudioSource = GetComponent<AudioSource>();

            // Set this AudioSource to receive participant's audio stream
            streamAudioTrack.SetAudioSourceTarget(_audioOutputAudioSource);
        }
    }

    // Unity's special method called when object is destroyed
    private void OnDestroy()
    {
        // It's a good practice to always unsubscribe from events
        _participant.TrackAdded -= OnTrackAdded;
    }

    // This AudioSource will play the audio received from the participant
    private AudioSource _audioOutputAudioSource;

    // Keep reference so we can unsubscribe from events in OnDestroy
    private IStreamVideoCallParticipant _participant;
}
This script will be attached to a game object representing a single call participant and handle its track.
Let's break this down to better understand it:
The Init method:
12345678910111213141516public void Init(IStreamVideoCallParticipant participant)
{
    _participant = participant;

    // Add debug name so we can see in the Unity Editor which participant this game object represents.
    gameObject.name = $"Participant - {participant.Name} ({participant.SessionId})";

    // Process already available tracks
    foreach (var track in _participant.GetTracks())
    {
        OnTrackAdded(_participant, track);
    }

    // Subscribe to TrackAdded - this way we'll handle any track added in the future
    _participant.TrackAdded += OnTrackAdded;
}
- Saves the
IStreamVideoCallParticipantreference in a class field. - Updates the game object name - this improves readability in the Hierarchy window.
- Loops over currently available tracks and calls
OnTrackAddedfor each available track. - Subscribes to the
IStreamVideoCallParticipant.TrackAddedevent to handle any tracks that might be added after we've joined the call.
The OnTrackAdded method:
1234567891011121314private void OnTrackAdded(IStreamVideoCallParticipant participant, IStreamTrack track)
{
    Debug.Log($"Track of type `{track.GetType()}` added for {_participant.Name}");

    // For this tutorial we only care for audio tracks but video tracks are also possible
    if (track is StreamAudioTrack streamAudioTrack)
    {
        // Create AudioSource
        _audioOutputAudioSource = gameObject.AddComponent<AudioSource>();

        // Set this AudioSource to receive participant's audio stream
        streamAudioTrack.SetAudioSourceTarget(_audioOutputAudioSource);
    }
}
- Uses .NET's pattern matching to check if
trackis of typeStreamAudioTrack. In this tutorial, we're using audio tracks, but if you'd be implementing video calls, you'd also have to handle theStreamVideoTrackcase. - Creates the
AudioSourcecomponent to receive the participant's audio stream. - Sets the newly created
AudioSourceas a target of the received audio track. For this, we use thestreamAudioTrack.SetAudioSourceTargetmethod - this is essential for theAudioSourceto receive audio data from the participant.
Next, in the OnDestroy method (called by Unity), we unsubscribe from the TrackAdded event:
12345private void OnDestroy()
{
    // It's a good practice to always unsubscribe from events
    _participant.TrackAdded -= OnTrackAdded;
}
And lastly, we've defined two fields to keep the AudioSource and the participant references:
12345// This AudioSource will play the audio received from the participant
private AudioSource _audioOutputAudioSource;

// Keep reference so we can unsubscribe from events in OnDestroy
private IStreamVideoCallParticipant _participant;
Step 10 - Add UI logic to handle call participants
Open the UIManager.cs in your code editor and make the following changes.
Add this field to the class:
12private readonly Dictionary<string, ParticipantPanel> _callParticipantBySessionId
        = new Dictionary<string, ParticipantPanel>();
We'll use this to reference the ParticipantPanel component we'll create for every participant. We keep references in the dictionary where a SessionId will be the key. This way, whenever a participant leaves the call, we can easily find and destroy the corresponding game object.
Next, add this method to the UIManager class:
12345678private void OnParticipantJoined(IStreamVideoCallParticipant participant)
{
    var participantPanel = Instantiate(_participantPanelPrefab, _participantsContainer);
    participantPanel.Init(participant);

    // Save reference by Session ID so we can easily destroy when this participant leaves the call
    _callParticipantBySessionId.Add(participant.SessionId, participantPanel);
}
The OnParticipantJoined method will be executed for each call participant. It does 3 things:
- Spawns a new instance of the
ParticipantPanelprefab. - Calls the
ParticipantPanel.Initmethod and passes theIStreamVideoCallParticipantobject. - Adds the newly spawned panel to the
_callParticipantBySessionIddictionary using the participant's SessionId as key.
Next, add the OnParticipantLeft method to the UIManager class:
12345678910111213141516private void OnParticipantLeft(string sessionId)
{
    if (!_callParticipantBySessionId.ContainsKey(sessionId))
    {
        // If participant is not found just ignore
        return;
    }

    var participantPanel = _callParticipantBySessionId[sessionId];

    // Destroy the game object representing a participant
    Destroy(participantPanel.gameObject);

    // Remove entry from the dictionary
    _callParticipantBySessionId.Remove(sessionId);
}
The OnParticipantLeft will be called whenever a participant leaves the call. We're using the participant's sessionId to check if the ParticipantPanel associated with the participant exists in the _callParticipantBySessionId dictionary and destroy the game object if it does.
Next, add these 2 lines anywhere to the Start method:
123// Subscribe to events so we can react to changing participants in the call
_audioRoomsManager.ParticipantJoined += OnParticipantJoined;
_audioRoomsManager.ParticipantLeft += OnParticipantLeft;
This will subscribe to the AudioRoomsManager events that we've added earlier and trigger the logic to handle participants joining or leaving the call.
Lastly, replace the OnLeaveButtonClickedAsync with the following code:
123456789101112131415161718private async void OnLeaveButtonClicked()
{
    try
    {
        await _audioRoomsManager.LeaveCallAsync();

        foreach (var panel in _callParticipantBySessionId.Values)
        {
            Destroy(panel.gameObject);
        }

        _callParticipantBySessionId.Clear();
    }
    catch (Exception e)
    {
        Debug.LogException(e);
    }
}
We added this part:
123456foreach (var panel in _callParticipantBySessionId.Values)
{
    Destroy(panel.gameObject);
}

_callParticipantBySessionId.Clear();
This will destroy all participant panels after we leave the call and clear the dictionary.
Step 11 - Android/iOS
An additional step is needed if you wish to test this app on an Android or iOS. You can skip this step if you only test on a standalone platform (Win, Linux, macOS). Mobile devices often require applications to explicitly request permissions for the user's camera or microphone devices, which the user must grant. Otherwise, the app may be unable to access the camera or microphone.
Handling permissions on Android:
12345678// Request microphone permissions
Permission.RequestUserPermission(Permission.Microphone);

// Check if user granted microphone permission
if (!Permission.HasUserAuthorizedPermission(Permission.Microphone))
{
    // Notify user that microphone permission was not granted and the microphone capturing will not work.
}
Handling permissions on iOS:
12345678// Request permission to use the Microphone
Application.RequestUserAuthorization(UserAuthorization.Microphone);

// Check if user granted microphone permission
if (!Application.HasUserAuthorization(UserAuthorization.Microphone))
{
    // Notify user that microphone permission was not granted and the microphone capturing will not work.
}
Add this code to the Start method of the UIManager class.
Step 12 - Test
We're now ready to test our app!
It's best to use multiple devices for testing. Otherwise, you may run into conflict when multiple applications attempt to use the microphone on a single device.
A quick testing setup:
- Right-click the Join Call button in the box below and copy the URL.
- Send this URL to another device you have, e.g., your smartphone. You can send it to multiple devices if you want.
- Run the project in the Unity Editor and click the Join button to join the call.
- Open the Join Call URL you've sent to other devices and join the call.
There are a few things to double-check:
- Ensure that you're using the same App ID and the Call ID on all devices you wish to connect
- On standalone platforms (Win, macOS, Linux), headphones with a microphone can be represented as two devices: Headphones and the Headset. Select the Headset in the Unity app to use the microphone in the application and as the audio output device in the OS.
Here are credentials to try out the app with:
| Property | Value |
|---|---|
| API Key | Waiting for an API key ... |
| Token | Token is generated ... |
| User ID | Loading ... |
| Call ID | Creating random call ID ... |
Note: Test credentials provided above will be unique for each browser session. To join the call from multiple devices, ensure you copy and use the same Call ID
Congrats! You should now be able to join the audio call from multiple devices.
Other built-in features
There are a few more exciting features that you can use to build audio rooms:
- ** Requesting Permissions **: Participants can ask the host for permission to speak, share video etc
- ** Query Calls **: You can query calls to easily show upcoming calls, calls that recently finished etc
- ** Call Previews **: Before you join the call you can observe it and show a preview. IE John, Sarah and 3 others are on this call.
- ** Reactions & Custom events **: Reactions and custom events are supported
- ** Recording & Broadcasting **: You can record your calls, or broadcast them to HLS
- ** Chat **: Stream's chat SDKs are fully featured and you can integrate them in the call
- ** Moderation **: Moderation capabilities are built-in to the product
- ** Transcriptions **: Transcriptions aren't available yet, but are coming soon
Recap
It was fun to see just how quickly you can build an audio-room for your app. Please do let us know if you ran into any issues. Our team is also happy to review your UI designs and offer recommendations on how to achieve it with Stream.
Calls run on Stream's global edge network of video servers. Being closer to your users improves the latency and reliability of calls. For audio rooms we use Opus RED and Opus DTX for optimal audio quality.
The SDKs enable you to build audio rooms, video calling and livestreaming app very easily.
We hope you've enjoyed this tutorial, and please do feel free to reach out if you have any suggestions or questions.
Final Thoughts
In this audio app tutorial we built a fully functioning Unity Audio Rooms app with our Video SDK for Unity library.
Both the video SDK for Unity and the API have plenty more features available to support more advanced use-cases.